
| 일 | 월 | 화 | 수 | 목 | 금 | 토 |
|---|---|---|---|---|---|---|
| 1 | 2 | 3 | 4 | 5 | ||
| 6 | 7 | 8 | 9 | 10 | 11 | 12 |
| 13 | 14 | 15 | 16 | 17 | 18 | 19 |
| 20 | 21 | 22 | 23 | 24 | 25 | 26 |
| 27 | 28 | 29 | 30 |
- 톰캣
- Mockito #Reflection #Sigleton #Test #JUnit
- 외장톰캣
- 디자인패턴 #싱글톤
- tomcat
- Spring Framework
- LiveTemplate
- autocomplete
- spring
- Today
- Total
자라선
(React & Express 를 이용한 웹 어플리케이션 개발하기) 3일자 - 환경구축 본문
Editor: vscode
middleServer: nodejs
package-manager: npm
※주의: 내가 시청한 강의는 16년도 강의인지라 이 밑에 의존성 모듈들은
전부 구버전으로 명시하여 모듈들을 설치하였다.
# Global 의존성 설치
D:\2.develop\2.workspace\ReactInflearnStudy> npm install -g webpack@1.13.1 webpack-dev-server@1.14.1webpack: 브라우저 위에서 import(require)를 할 수 있게 해주고 자바스크립트 파일들을 하나로 합쳐주는 빌드 툴
webpack-dev-server: 별도의 서버를 구축하지 않고도 static 파일을 다루는 웹서버를 열 수 있으며 hot-loader를 통하여 코드가 수정 될 때마다 자동으로 리로드 되게 해주는 개발용 툴
# npm을 초기화하여 프로젝트를 생성
D:\2.develop\2.workspace\ReactInflearnStudy> npm init
npm init: 프로젝트 폴더에 init을 사용하여 프로젝트를 생성함
# react 설치 및 프로젝트에 패키지 정보 추가
D:\2.develop\2.workspace\ReactInflearnStudy> npm install --save react@15.2.1 react-dom@15.2.1
--save 키워드를 추가하여 프로젝트에 해당 패키지의 정보를 추가해준다.
npm install --save-dev webpack@1.13.1 webpack-dev-server@1.14.1
npm install --save-dev babel-core@6.9.1 babel-loader@6.2.4 babel-preset-es2015@6.9.0 babel-preset-react@6.5.0 react-hot-loader@1.3.0
--save-dev 는 개발용 이라고 하여 프로젝트에 정보를 추가함. (패키지 관리를 위해서 추가해주는 편)
babel: ES6문법을 프로젝트에서도 사용할 수 있도록 해주는 모듈
babel-preset-react: JSX문법를 인식할 수 있는 react 모듈
react-hot-loader: 개발서버가 실행중에 특정 컴포넌트 변경시 변경된 컴포넌트만 변경하여 반영해주는 모듈
// webpack 모듈을 불러옴
var webpack = require('webpack');

// export는 이 객체를 모듈로 내보내겠다는 뜻
module.exports = {
    // entry를 시작으로 필요한 모듈들을 불러옴
    entry: './src/index.js',

    // 최종적으로 합쳐진(빌드된) 파일의 target 경로와 파일명
    output: {
        path: __dirname + '/public/',
        filename: 'bundle.js'
    },

    // 개발서버의 설정
    devServer: {
        // 파일이 수정될때마다 리워딩 여부
        hot: true,

        // 리워딩때마다 빌드된 bundle.js에 합쳐주는것
        inline: true,

        // 개발서버 host
        host: '0.0.0.0',

        // 개발서버 포트
        port: 4000,

        // index파일의 경로
        contentBase: __dirname + '/public/',
    },

    module: {
        // react나 ES6(es2015) 형식을 일반 JS형식으로 변환해줌
        loaders: [
            {
                test: /\.js$/,
                loader: 'babel',
                exclude: /node_modules/,
                query: {
                    cacheDirectory: true,
                    presets: ['es2015', 'react']
                }
            }
        ]
    },

    // hot모듈을 플러그인으로 추가함, 이 밖에 다양한 플러그인 또한 추가가능
    plugins: [
        new webpack.HotModuleReplacementPlugin()
    ]
}
webpack.config.js 파일을 프로젝트에 추가하여 위와 같이 작성함 webpack의 기본설정을 담는 파일
<html>
    <head>
        <meta charset="UTF-8">
        <title>React App</title>
    </head>

    <body>
        <div id="root"></div>
        <script src="bundle.js"></script>
    </body>
</html>
/public/index.html 를 파일을 생성하여 위와 같이 추가.
루트 디바이저를 정의하고 그 밑에 bundle.js라고 webpack.config.js에 정의했던 output 파일을 스크립트에 정의함
// import 는 ES6의 문법
// var React = require('react'); 와 같은 의미
import React from 'react';

class App extends React.Component{
    render(){
        return (
            <div>Hello</div>
        );
    }
}

// ES6의 문법
// module.export = App; 와 같은 의미
export default App;
/src/components/App.js 파일을 생성하여 위와 같이 추가
import React from 'react';
import ReactDOM from 'react-dom';
import App from './components/App';

const rootElement = document.getElementById('root');
ReactDOM.render(<App/>, rootElement);
/src/components/index.js 파일을 생성하여 위와 같이 추가
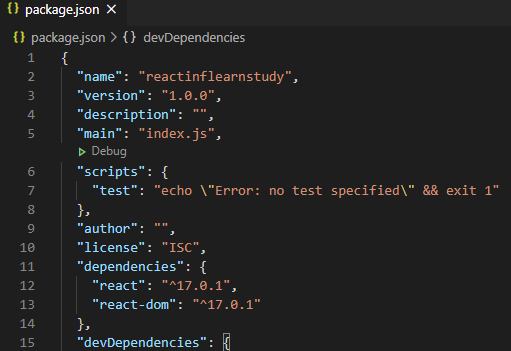
{
  "name": "reactinflearnstudy",
  "version": "1.0.0",
  "description": "",
  "main": "index.js",
  "scripts": {
    "test": "echo \"Error: no test specified\" && exit 1",
    "dev-server": "webpack-dev-server"
  },
  "author": "",
  "license": "ISC",
  "dependencies": {
    "react": "^15.2.1",
    "react-dom": "^15.2.1"
  },
  "devDependencies": {
    "babel-core": "^6.9.1",
    "babel-loader": "^6.2.4",
    "babel-preset-es2015": "^6.9.0",
    "babel-preset-react": "^6.5.0",
    "react-hot-loader": "^1.3.0",
    "webpack": "^1.13.1",
    "webpack-dev-server": "^1.14.1"
  }
}
scripts 에 "dev-server" 를 추가하여 개발서버를 열 스크립트를 추가한다.
PS D:\2.develop\2.workspace\ReactInflearnStudy> npm run dev-server

> reactinflearnstudy@1.0.0 dev-server D:\2.develop\2.workspace\ReactInflearnStudy
> webpack-dev-server

http://0.0.0.0:4000/
webpack result is served from /
content is served from D:\2.develop\2.workspace\ReactInflearnStudy/public/
Hash: 711d875418c72cd0baad
Version: webpack 1.13.1
Time: 893ms
    Asset    Size  Chunks             Chunk Names
bundle.js  988 kB       0  [emitted]  main
chunk    {0} bundle.js (main) 914 kB [rendered]
    [0] multi main 52 bytes {0} [built]
    [1] (webpack)-dev-server/client?http://0.0.0.0:4000 2.67 kB {0} [built]
    [2] ./~/url/url.js 22.3 kB {0} [built]
    [3] ./~/url/~/punycode/punycode.js 14.6 kB {0} [built]
    [4] (webpack)/buildin/module.js 251 bytes {0} [built]
    [5] ./~/querystring/index.js 127 bytes {0} [built]
    [6] ./~/querystring/decode.js 2.4 kB {0} [built]

 .....

   [244] ./~/react/lib/getHostComponentFromComposite.js 789 bytes {0} [built]
   [245] ./~/react/lib/renderSubtreeIntoContainer.js 466 bytes {0} [built]
   [246] ./src/components/App.js 2.33 kB {0} [built]
webpack: Compiled successfully.
npm run dev-server 로 서버를 실행하여 확인을 마친다.
'Develop > React' 카테고리의 다른 글
| (React & Express 를 이용한 웹 어플리케이션 개발하기) 5일차 - 간단한 State 활용 검색 (0) | 2021.01.12 |
|---|---|
| (React & Express 를 이용한 웹 어플리케이션 개발하기) 4일차 - React-Hot-Loader (0) | 2021.01.06 |
| (React & Express 를 이용한 웹 어플리케이션 개발하기) 2일자 - map (0) | 2021.01.05 |
| (React & Express 를 이용한 웹 어플리케이션 개발하기) 1일자 - JSX, props, state (0) | 2020.12.31 |
| (React & Express 를 이용한 웹 어플리케이션 개발하기) 1일차 - 기본 (0) | 2020.12.31 |

